My Round House

My Round House
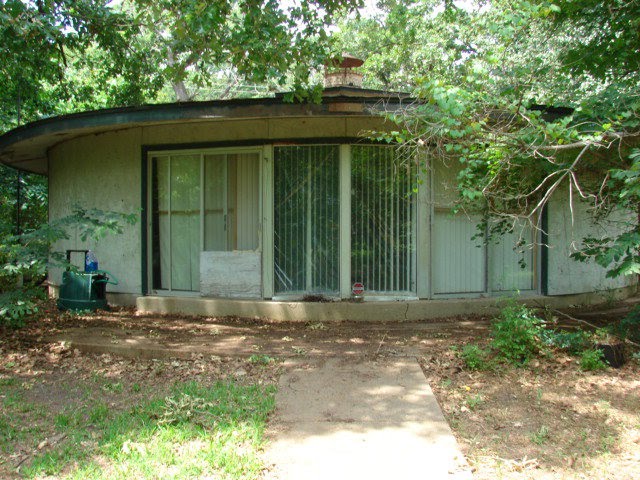
Believe it or not, it's round!

Wednesday, May 30, 2012

Drywall - Guest bath

Two walls were drywalled over the weekend leaving one and a half walls remaining.
Over the tub
The sink and throne walls
The remaining wall to the left of the sink wall.

Drywall - Master Bath

I spent Memorial Day Weekend working on the house but equally trying to find reasons to not work on the house.  In the end, not working on the house didn't work out too well.  Discovered none of the local municipalities had anything scheduled over the weekend.  Not one "things to do" listed in the paper.  Go figure.

Sooooo..... I stayed focused on the house....or tried to!

Friday evening started with applying drywall in the bathrooms.  While I focused primarily on the Master Bath first, I alternated back and forth between the two bathrooms depending on the size of drywall needed.  I had a bunch of scrape/left over pieces that I wanted to use up before running to the big box store for more.

In the Master Bath, I started working from one end to the other, the entry doorway to the new shower stall. 
Sink Wall
Work also involved putting up some of the remaining hardibacker cement board.  Various pieces had to be cut and trimmed to fit the outside curve but I finally got it all in place.  Originally I framed in an additional alcove on the back end of the shower stall but later I ran into problems in how I was to secure the back panel.
After a lot of thought, I decided to skip it since I already had an alcove in the forward divider wall and simply paneled over it.
Only the last piece of hardibacker board needs to be cut and installed on the shower's outside divider wall. 

Towards the entry door


Thursday, May 24, 2012

Drywall - More hallway

Finished up adding drywall to the lower hallways on either side of the fireplace.  I'd throw in some pics in but didn't take any.

Still have the ceiling on the right side of the fireplace.  I'll get to it eventually!!

Monday, May 21, 2012

Drywall - Central hall ceilings

Sunday
After several delays throughout the day I finally managed to start work on the ceilings in the interior hallway.  Not sure why it took so long, guess I was worried about closing up the ceilings in this area which, for all intents and purposes, eliminates future access to those spaces affected by the closure, namely the chases between the rooms where all the wiring and plumbing resides.  It was inevitable this day would come so it was important that when it did I was confident the infrastructure was fully in place and ready or I was going to be S.O.L.. 

As it turned out, Sunday was the day....which, in and of itself, is a significant milestone.

The hallways
As you enter the house, the hallway splits left and right to enter the Great Room on either side of the fireplace.

The work referenced here involved the left side ceiling as you look at the fireplace.  The right side will be tackled in the next go round.

Low ceilings
As you can see in the picture above, ceilings were only 84" high, or mere 7'.  It felt pretty claustrophobic when entering the house or moving between the rooms so during demolition when I realized how much dead space was above the old ceilings, I opted to reclaim as much height as possible.  Given the choice, I would have gone all the way to the roof deck but unfortunately that would have encroached on necessary duct space so I had to lower my expectations.  The ceiling is now the standard 8'.  The 2' above the new ceiling height houses various cables and the heat/AC duct work.
As in the entry hall, the exposed 2x4 wood surrounding the lower section of the ceiling will be covered with trim and will serve as a ledge for the future hidden up lighting that will bath the entry hall and the two side hallways with soft indirect lighting.

More later!


Lighting - More can lights

Well, I made some progress this weekend though truth be told, I was dragging butt the whole weekend.

Saturday
I watered the new grass and then got involved in an early morning conversation with the neighbor across the channel, Craig, who came over on his motorbike.  After working on clearing some mud from the new culvert pipe (put there before I put the grass down) I got involved in another conversation with the neighbor across the street.  Talking to Cody is always a little painful because he only talks about whatever his issue is at the moment and generally completely ignores anything I have to offer the conversation....  You got neighbors like that??

Anyway, that suddenly was extended another 30-40mins when some folks stopped on the street to ask about the lot three lots over to the left.  I walked down the street with them and showed them the lot and talked about the neighborhood.  From there I attended the POA meeting which cradle to grave ran almost two hours.  Then Craig stopped by again for another driveway conversation that ran nearly an hour.

It all served to give me a valid reason to avoid working on the house.  However, by late afternoon I managed to overcome my malaise and installed matching mini can lights in the master and second bedroom closets.

Master Bedroom
Three cans for the big room.
Master Bedroom Closet

Master Bedroom Closet
Second bedroom
Two cans for the second bedroom closet. 
2nd bedroom
Part of the install naturally involved the light switches.  Well, some time ago in the 2nd bedroom I installed a switch inside the closet as you can see in the pic above.  However, I had yet to get that far for the master bedroom but you might recall an earlier posting I decided the door needed to be reversed....which meant the light switch on the wall had to be moved.  So I relocated the switch box and given it's proximity to the closet, installed a two switch box to also house the closet light switch.
Double switch at the door
It worked out pretty well, but then that got me thinking about the placement of the switch in the second bedroom closet which I originally installed inside the closet.
Single switch at the door, single switch in the closet.
Seems to me, for consistency, that switch should also be in a double switch box next to the light switch.  It's pretty close to the closet opening so it's not a stretch to make it work.  I'm going to ponder that one a bit longer before I decide to open the wall back up and replace the single box with a double box. 

What do you think??


Thursday, May 17, 2012

Landscaping - Load two completed

This morning before my morning brew of java (not recommended), I started laying the last of the sod completing the task about 8:45am.
It all looks good in the morning sun.
From this angle you can see the height of the berm
I figure it will take two more pallets of sod to cover the left lower side of the berm but I think I'm going to wait a bit before picking up the next pallet.

Wednesday, May 16, 2012

Landscaping - Another load of sod

I'm up early this morning to make another run down to the Malakoff Trading Post to pick up another pallet of sod.  The first pallet covered only about 1/3 of the dirt berm so I'm figuring probably four pallets all together just to get the new elevation covered and even then I'm not sure all of the scraped surfaces will get grass....in fact, I know they won't.  Nature and some seed will have to take care of the rest.

It might provide instant gratification but at $150 per pallet, looking pretty ain't cheap!

Irrigation - A lovely geyser.....sideways

Monday evening, after watering the newly installed sod out front I decided to spend an hour or so mowing the roadside ditches in the neighborhood with the tractor and mower.  It was something I said I would help out the POA on while I still have the tractor. 

When I came home, I just happened to look around the corner (what corner??) of the house and saw a lovely horizontal geyser down at the new pump.  I had forgotten to turn the pump off.  Now, in theory, the pump should have just run spinning the water in the pump chamber but if there is a weakness in the system, the water pressure is going to find it.

It would appear that while I screwed in the supply line connector I apparently didn't screw it in far enough (like halfway) and the pressure caused it to pop out!  Who knew!??  So last night after work I set about correcting the problem.  I fixed the supply line and reprimed the pump only to find that the suction side was sucking air around the threads on the suction side connector.  It would seem I didn't get that screwed in quite far enough too.  Since it all of the connectors had pipes glued in, the two pipes had to be cut and the connectors replaced.  Grrrr......  or should that be Duuuuhhhhhh?? 

That suction side of the process was a bit more of a challenge because it involved several 45degree angle connectors and standing in the channel trying to get the angles, getting the measurements right and cutting it at the right places.....all without losing balance in my rubber boots and taking a dive.  After about 90mins of messing with it and another trip to the big box hardware store, I prevailed and the water flowed again.

JEESH!!

Monday, May 14, 2012

Irrigation - Lake Pump Installation


A week or so ago I laid the foundation for the new lake pump.

Now, with the laying of the new sod out front on Saturday, it was imperative to finalize its installation and get it running by Sunday so that the new lawn would have sufficient non-city water to survive by.

I spent most of Sunday getting it in place and connected.
Drilling Bolt holes
The pump in place
Adding in/outflow connectors
Trying to the get the main 2" line from the water to line up at the right angle was a bit of a challenge but I finally got it cut down to the right length to allow for a good 45degree connection.
2" intake, 1.5" outflow which drops to a 1" pipe
Eventually I will build a small house around the pump to protect it from inclement weather.  It will also serve to provide some sense of sound insulation (not that you can hear it much anyway).

The water (white) and electrical (grey) pipes will temporarily remain on the surface until I'm ready to draft up a complete irrigation plan at which point they will be buried and out of sight.  For now, it was important to get lake water to the front of the house as soon as possible to provide an unlimited source of water to the newly laid lawn at the front. 
Temporary surface run.
Electrical....
Before I bought the house, there had been an outdoor storage shed in such a state of disrepair that HUD tore it down.  With the power turned off at the circuit breaker, HUD simply cut the wire and left it in the ground.  It took me a while to figure out where the wires from the 60amp circuit inside the house's power panel led to.  It was only when I rewired the power panel that I was able to trace them to their destination....a cut and partially buried conduit in the ground outside.  YIKES!!  Glad it wasn't live.  Anyway, I left the 8 gauge wiring in place figuring it would be useful later.
Temporary connection.
It was!  For now I temporarily wired the old power line to the new line leading down to the pump.  Eventually, when the future irrigation plan is devised and goes into effect, the grey power conduit to the pump will be buried along side the water line and an above ground connector box with pump switch and external power outlet will be installed.
The hole in the ground will be filled in and a small cement pad will be poured around the 90degree elbow that bring the power lines up above ground.  A switch box will be mounted on top of that keeping it high and dry.  It will be enclosed or surrounded by vegetation in some manner so as to make it visually less obvious.

The temporary surface water line leads to a new surface water spigot enabling me to get lake water to the newly planted sod covering the berm.
Temporary spigot


Inspector wars.....
The Inspector from across the street...
(and the Bosses sworn enemy.....)
(even though she can't resist keeping an eye on him)


Landscaping - First step...

...of many to come.

As mentioned in a prior post, the completion of the drainage control issues left me with new terrain out front, namely 2' raised dirt berm between the street and the area to the left side of the carport.

It started out as two tall piles of dirt..... 
.....and was reformed to be a berm spreading out out some 40-50' from it's peak in a wide arch before it reaches the existing untouched grass areas.  
The peak of the berm, between the two far trees,
is about 2' higher than before and tapers this way.
While the drainage project essentially did it's job, the dirt berm had it's own subsequent issues.....

When raining water flows off the berm pretty quickly taking with it each time a layer of silt which either makes it's way towards the lake on the downhill side, or into the ditch and through the new drainage pipe..  It's not been a problem per se thus far but with the last heavy rain, it became apparent I should not wait to deal with it.  The berm, if left unattended could (and would) dissolve itself eventually overcoming and defeating the intended purpose of the original drainage control work.  As it is, with the first major rain, the new pipe already collected about 2" of silt.

Time to act.....
So, last week I ordered a pallet of St. Augustine grass for a Saturday morning pickup.  
Each pallet weighs 3000lbs thereabouts so
only one pallet per trip
 I started in the ditch and worked my way towards the carport.
Stopping the silt flow
The Boss checking on my work!
This will slow the migration of silt into the pipe.
Done!
Boss:  Not so fast Dude!!  What about this half the berm??
 Alright....Gimme a break!!  Done with the first of what I figure to be 4 pallets total.....!
Boss:  Just keeping ya humble Dude!  Just keeping ya humble.

Monday, May 07, 2012

Drywall - Kitchen and Entry Hall

In spite of some extracurricular activities over the weekend and some interruptions by neighbors stopping by to chat, I managed to get some additional drywall put up.

Kitchen...
I have to hand it to guys who do drywalling as a profession!  It's fraught with inconsistencies and time consuming frustrations.  Try as I might to get the measurements down exactly, sometimes the wall itself thwarts you.  I had to raise and lower the second sheet a couple of times to get it right and even then I ended up with a 1/2" gap at the top between the two sheets.  It bugged me for awhile but I finally was able to let it go knowing the imperfect gap would disappear when the wall was mudded and taped.

 Entry hall....
In case you're wondering.....  The 2x4 running along the upper middle of hallway was the original ceiling height with the cross pieces attached to either side.  I deliberately left those in place to serve as a ledge or channel to contain hidden up lighting.  They will be covered over with the lighting behind the top lip.

Getting there!!

Extracurricular activties....for a change!

Saturday...
This weekend was split between working on the house and not working on the house doing some other fun stuff.  Saturday I went to local car show with a former big box home improvement store employee and friend Margie.  We made a couple of stops along the way, one of which was a small fruit and vegetable stand to pick up some veggies.  For the last couple of years I've been contemplating trying my hand at developing my own vegetable garden.  I've been watching Mary, the woman I bought the right side lot from, managing her own garden.  Stopping at the veggie stand has got me thinking of that again.  More on that in a future post.

I took a long nap when I got back and then got out with the tractor and mowed both sides of the house.
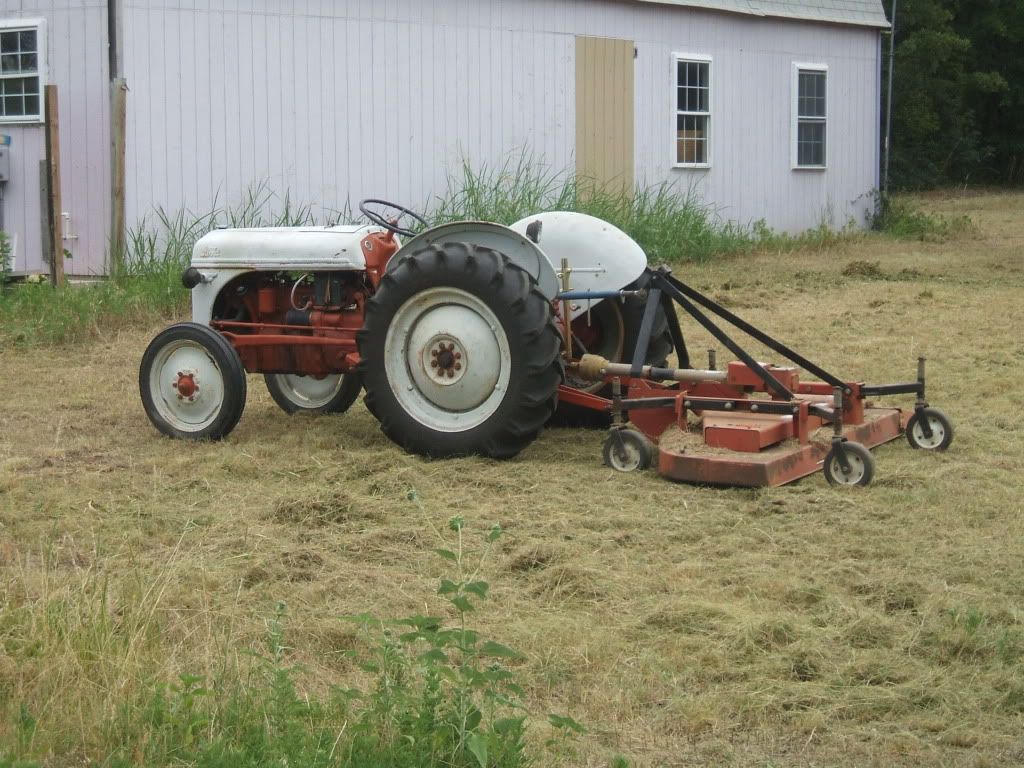
Best suited for large open areas
It's a 1948 Ford 8N with a 72" finishing mower.  I picked it up so I could keep the grass and such in check around the Waco property.  It does the job well there where I used it for three years but at Round House, as mentioned in a prior post, with the number of trees and the slope nearer the water, I really need to downsize to something more in line with the characteristics of the property.  Everyone tells me the zero turn is the best option so I will give that all due consideration.

Sunday....
On Sunday, my neighbor across the channel, Craig, extended an invite to go out out on his boat so we hit the lake.  For me it was the first time out on this lake ever and the first time in a boat since before I moved here a year ago March.  GADS!!  A year ago.  Between working on the house and the horrendous drought, I totally missed last years boating season.  It makes me think I should bring my boat down though I'm not sure about introducing a distraction from working on the house.  Anyway we tooled around the water front for several miles.  You sure gain a different perspective from the water!  I like it.  There are a lot of beautiful homes along the water.